Instant Pot Berry Vanilla Cake
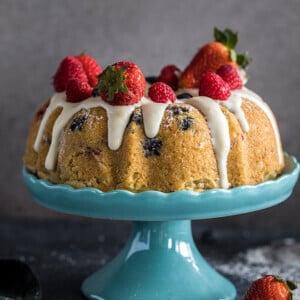
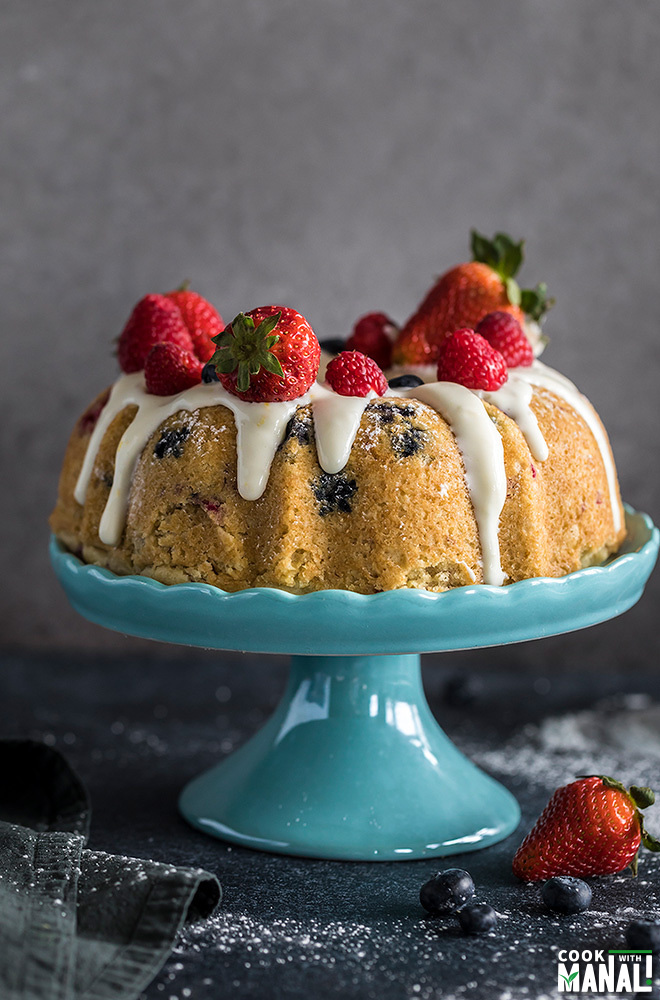
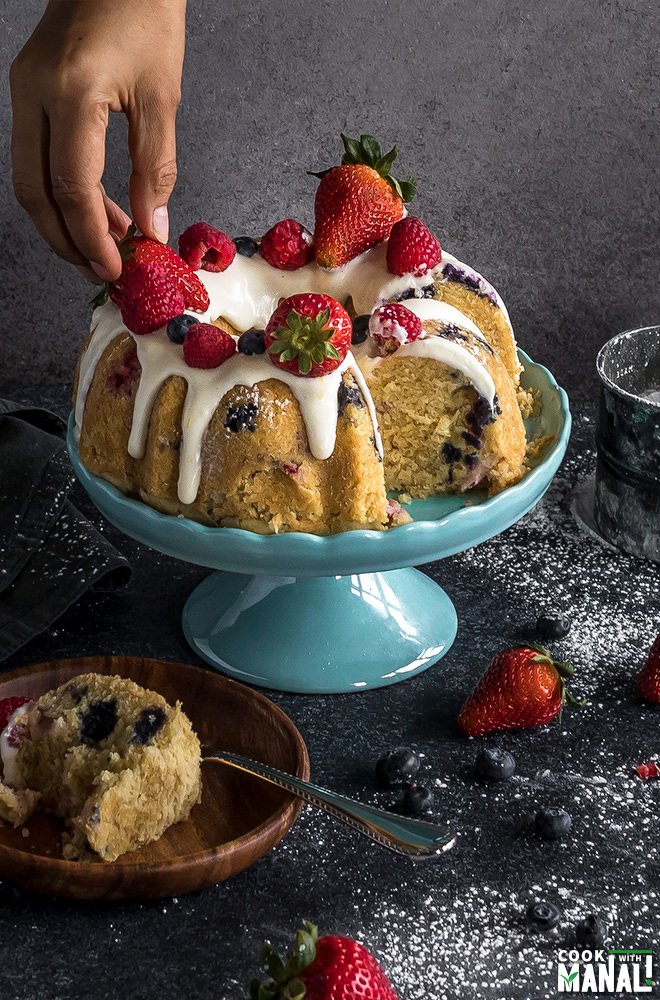
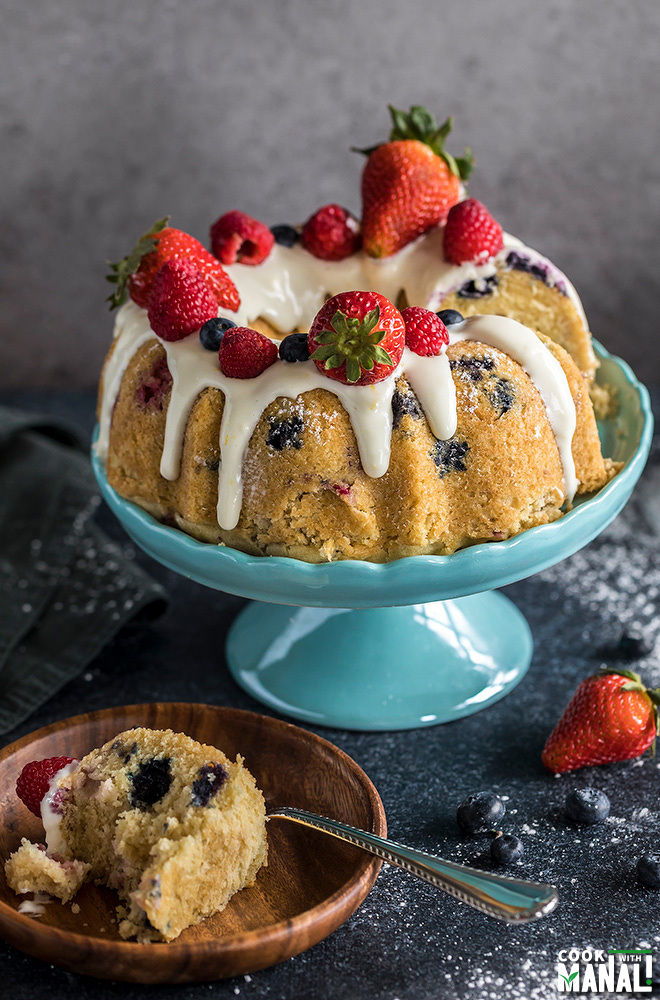
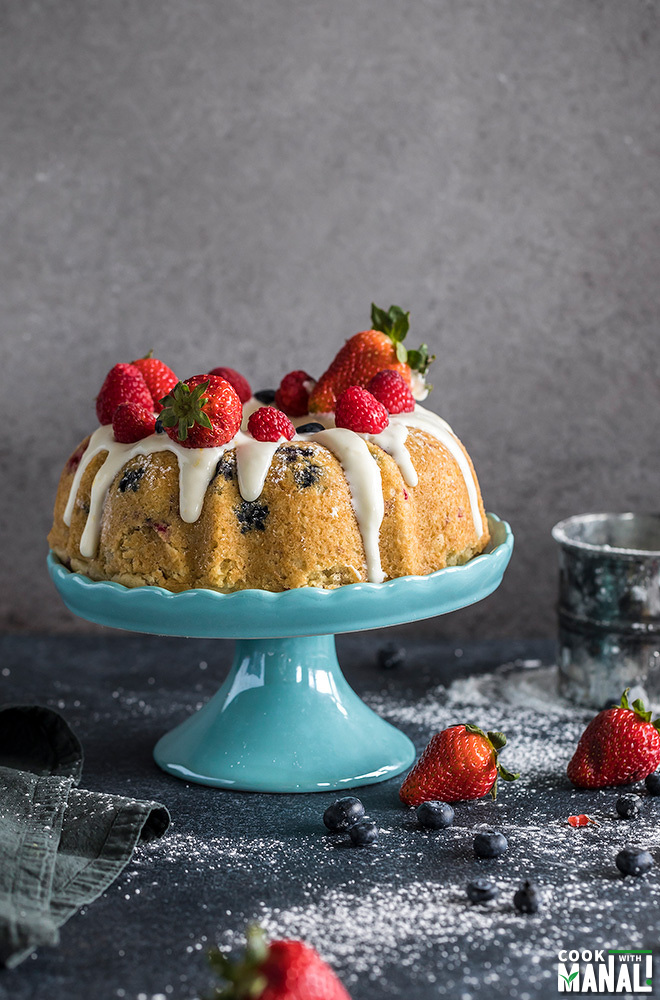
Simple and elegant Berry Vanilla Cake made in the Instant Pot. You don't even need to turn on your oven to make this cake. It's topped with a cream cheese glaze making it the perfect dessert for your summer parties!
This post may contain affiliate links. Please read our disclosure policy.
Simply perfect Instant Pot Berry Vanilla Cake! You won’t believe how easy it is to make a cake without turning on your oven!
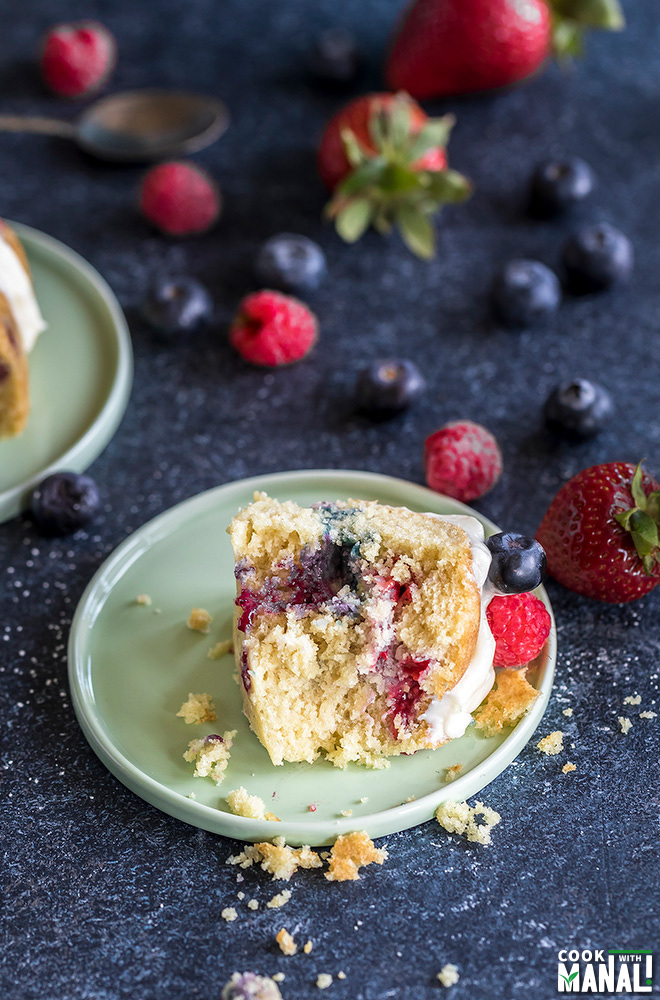
This soft and moist vanilla cake is filled with fresh summer berries and topped with a cream cheese glaze making it the perfect dessert for your summer parties!
If you love all the Instant Pot vegetarian/vegan recipes that I share on the blog, please join me on this Facebook Group – Instant Pot Vegetarian Recipes. The group would share/feature vegetarian instant pot recipes and ideas from all around the web!
It’s rather surprising that I haven’t shared an Instant Pot dessert on the blog. My cookbook has an entire chapter on Instant Pot desserts but somehow I never got around posting one on the blog.
But better late than never I guess! So here I am with my first Instant Pot dessert- Berry Vanilla Cake! This cake is just perfect for the season. It’s a simple vanilla cake with mixed berries and topped with a cream cheese glaze.
With the long weekend just around the corner it would be the perfect dessert to make for Memorial Day. The best part about this berry vanilla cake is that you don’t even need to turn on your oven!
It is really hot here these days and the last thing I want to do is to turn on my oven. The Instant Pot makes it so convenient to make a cake without an oven. I am sure once you make a cake in your IP, you are going to get hooked onto it.
How to Make Cake In An Instant Pot
If you are one of those who has never tried baking a cake in their pressure cooker and the whole idea actually sounds intimidating, let me tell you it is quite easy! You start exactly in the same way as you would for any other cake.
The difference comes in cooking method and the final texture of the cake.
Cooking Method
You make the cake batter in a similar way as you would make for a cake that is baked. But in stead of being baked in the oven, the cake is cooked on high pressure.
Texture
Cake in an instant pot/pressure cooker is steamed. And so not surprisingly the texture is different than a baked cake.
Baking Pan
You need a cake pan which would fit inside an Instant pot. I have a 6qt DUO and I used a 6 cup bundt pan for this cake.
Tips to Make Cake In An Instant Pot
Few things to keep in mind
✓ Always add water to the pot before placing the trivet on top. Water is needed for the pot to come to pressure.
✓ Always remember to cover your cake pan with an aluminium foil as you put it inside the instant pot . As you cook the cake on high pressure, there will be condensation and you don’t want it to drop on your cake batter and make a mess out of it!
✓ To take the cake pan out of the pressure cooker easily (once the cake is cooked), make an aluminium sling.
To make the sling, take a long piece of aluminum foil (around 2 feet) and fold it twice or thrice length-wise. Wrap the sling around the pan and lift the cake pan using the sling and carefully place it down in the pot, over the trivet.
Once the cake is done, use the same sling to take the cake out of the Instant Pot.
✓ Let the cake cool completely before trying to slice it into pieces.
and now let’s talk about this recipe!
This Instant Pot Berry Vanilla Cake
✓ is the perfect summer dessert!
✓ packed with fresh berries
✓ drizzled with a cream cheese glaze. I added lemon zest to make the flavors pop up!
✓ perfect dessert to make for Memorial Day or 4th of July!
✓ you get the cake without turning on your oven!
Here’s how you make this berry vanilla cake recipe! Make sure to check out the video at the top.
Method
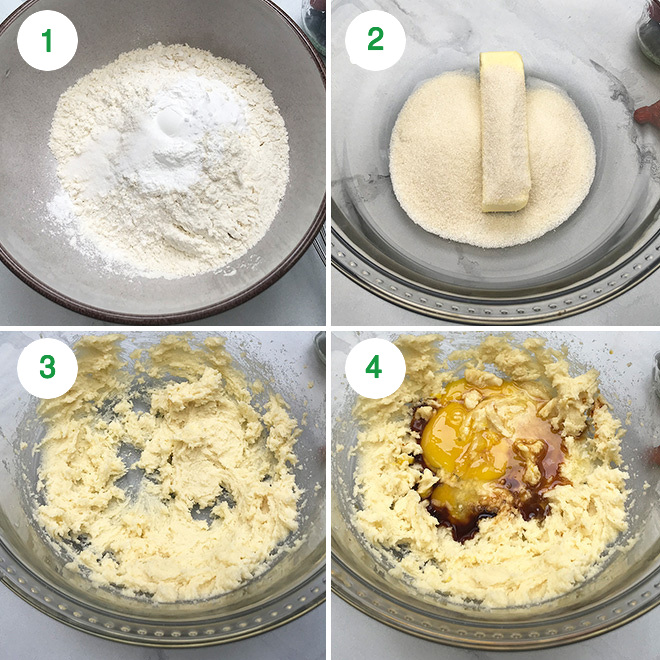
1- In a bowl whisk together flour, baking powder, baking soda and salt. Set it aside.
2- To another bowl add room temperature butter and sugar.
3- Cream the butter and sugar until smooth and creamy.
4- Add egg and vanilla extract and mix until combined.
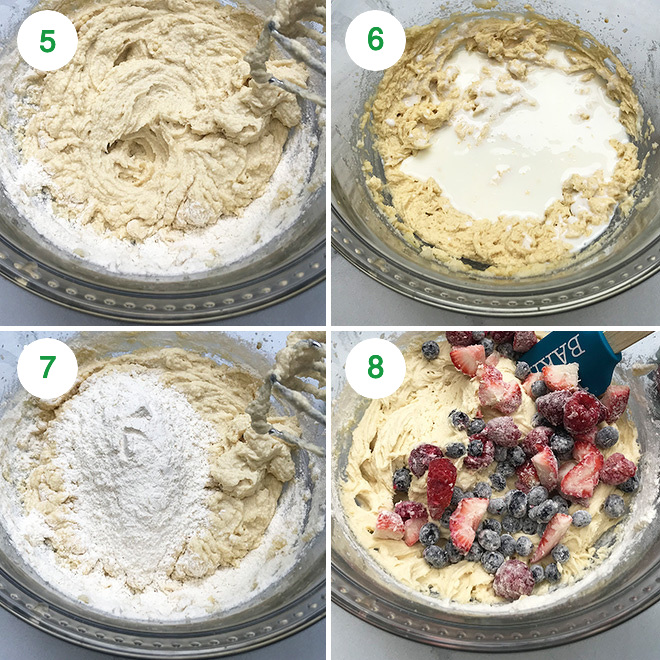
5- Add half of the flour mix and combine.
6- Add the buttermilk and mix. (If you don’t have buttermilk at home, here’s any easy way to make it at home – fill a 1/2 cup measuring cup with 1/2 tablespoon vinegar and then fill it with milk. Let it sit for 5 minutes and then use in the recipe)
7- Then add in the remaining half of the flour mix.
8- Fold in the berries. I tossed the berries in one tablespoon of flour before adding to the batter.
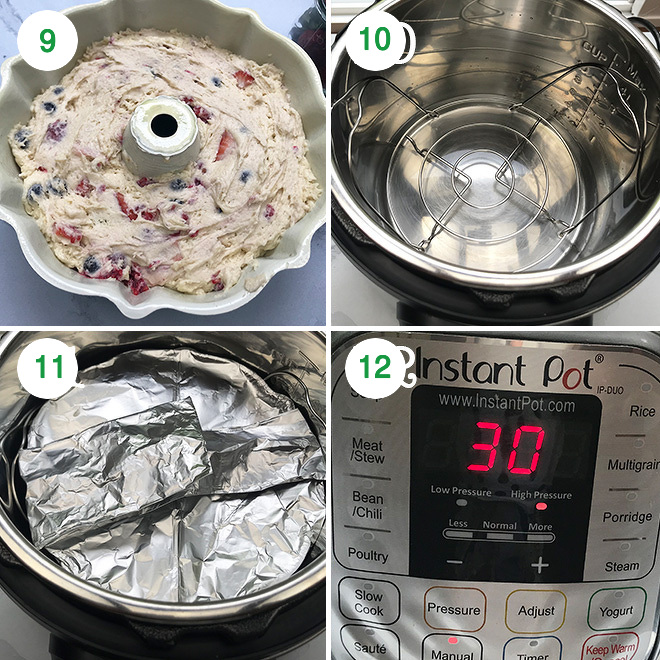
9- Spray a 6-cup bundt pan generously with a non-stick spray and then transfer the batter to it.
10- Add 1.5 cups water to the inner pot of your Instant Pot and then place a trivet inside.
11- Cover the cake pan with a piece of aluminium foil. With the help of an aluminium sling place the cake pan on top of the trivet.
[To make the sling, take a long piece of aluminum foil (around 2 feet) and fold it twice or thrice length-wise. Wrap the sling around the pan and lift the cake pan using the sling and carefully place it down in the pot, over the trivet]
12- Close the lid and press the manual or pressure cook button. Cook on high pressure for 30 minutes with the pressure valve in the sealing position. Let the pressure release naturally.
Open the lid and carefully lift the cake out of the instant pot using the aluminium sling. Let the cake sit for 5-10 minutes and then invert in onto a wire rack to cool completely.
Make a glaze by whisking together cream cheese with powdered sugar and milk/cream until smooth. You made add lemon zest to it. Pour glaze over the cooled cake and decorate with berries.
If you’ve tried this Instant Pot Berry Vanilla Cake Recipe then don’t forget to rate the recipe! You can also follow me on Facebook, Instagram, Pinterest and Twitter to see what’s latest in my kitchen!
Instant Pot Berry Vanilla Cake
Ingredients
Cake
- 1.5 cups all purpose flour 198 grams
- 2 teaspoons baking powder
- 1/4 teaspoon baking soda
- 1/4 teaspoon salt
- 1/2 cup unsalted butter 113 grams (1 stick), at room temperature
- 3/4 cup granulated white sugar 150 grams
- 1 large egg at room temperature
- 1.5 teaspoons vanilla extract
- 1/2 cup buttermilk
- 1 cup berries tossed in 1 tablespoon flour
Glaze
- 4 oz cream cheese at room temperature
- 1/2 cup powdered sugar
- 2-3 tablespoons cream or milk
- zest of 1 lemon optional
More berries, to decorate
Instructions
Cake
- In a bowl whisk together flour, baking powder, baking soda and salt. Set it aside.
- To another bowl add room temperature butter and sugar. Cream the butter and sugar until smooth and creamy.
- Add egg and vanilla extract and mix until combined.
- Add half of the flour mix and combine.
- Add the buttermilk and mix. (If you don't have buttermilk at home, here's an easy way to make it at home - fill a 1/2 cup measuring cup with 1/2 tablespoon vinegar and then fill it with milk. Let it sit for 5 minutes and then use in the recipe)
- Then add in the remaining half of the flour mix.
- Fold in the berries. I tossed the berries in one tablespoon of flour before adding to the batter.
- Spray a 6-cup bundt pan generously with a non-stick spray and then transfer the batter to it.
- Add 1.5 cups water to the inner pot of your Instant Pot and then place a trivet inside.
- Cover the cake pan with a piece of aluminium foil. With the help of an aluminium sling place the cake pan on top of the trivet.To make the sling, take a long piece of aluminum foil (around 2 feet) and fold it twice or thrice length-wise. Wrap the sling around the pan and lift the cake pan using the sling and carefully place it down in the pot, over the trivet.
- Close the lid and press the manual or pressure cook button. Cook on high pressure for 30 minutes with the pressure valve in the sealing position. Let the pressure release naturally.
- Open the lid and carefully lift the cake out of the instant pot using the aluminium sling. Let the cake sit for 5-10 minutes and then invert in onto a wire rack to cool completely.
Glaze
- Make a glaze by whisking together cream cheese with powdered sugar and milk/cream until smooth. You made add lemon zest to it.
- Pour glaze over the cooled cake and decorate with berries. Serve immediately.
Notes
Nutrition
Nutrition information is automatically calculated, so should only be used as an approximation.




I made this yesterday. Was disappointed. It is my first instant pot cake. It is dense, not alot of flavor, and kinda dry. I think the dry part might be my fault. I had left the keep warm on, but then again nothing said to make sure it is off. The release button didn’t go down then the keep warm came on. So, kinda new at this but I feel the release pressure button should have gone down before the keep warm sensor came on. Anyway not too happy with the outcome.
sorry it didn’t turn out well. You are right, the pressure releases naturally and then it goes on “keep warm”. Instant pot cakes are dense, they are steamed not baked so you can never have the same texture as a cake baked in the oven.
I was so bummed this recipe did not work for me… It was my first attempt at an instant pot cake. The only thing I changed was using Cashew milk instead of dairy milk. The cake was so heavy and dense that it fell apart when I tried to put it on the cooling rack, and that was after having to cook it for extra time after reading others comments.
Hi Sheryl, sorry to know this didn’t work. I have tested this recipe several times and it does work for me so I am not sure what went wrong. The cake is definitely dense since it’s steamed and not baked and in general we cannot expect the same cake texture that we get in the oven here when we steam it.
Hi Manali!!Can’t wait to try this cake.Please tell me,three queries-
How can I make this eggless?
For the glaze,cream should be fresh or heavy?And if using milk,then whole or cow’s?
Can I use dry blueberries and fresh strawberries?That’s what is available here.
Waiting…thanks!
Hi Parul- sorry I haven’t tested this recipe without eggs so I cannot comment on the accuracy of the recipe until and unless I have tried it myself.
for glaze you can use whole milk. You can use dry strawberries and blueberries- they don’t have the same flavor though.
I cooked this cake and it was delicious. The batter was uncooked after pressure cooked 30 mins and NPR 41 mins. I pressure cooked it again for an additional 15 minutes and 10 mins NPR. Cake came out perfect.
I made for Memorial Day with freshly picked blueberries. I used an IP Bundt and found it was raw after 30 minutes with natural release so I put it back for another 15 and let that release as well. The texture was a bit doughy but the flavor was great! I’ll tweak and try again. I have to say it was very cute. My guests seem to love.
I have a 3 qt Mini. Other than cutting the ingredients in half, do I need to change the cooking time? I can’t wait to make one!
cooking time should be same
This was a very tasty and very easy cake to make! It was a little underdone when the 45 min + NPR was done (I used a round cake pan so did the extra time) but I just popped it in for another 7 min + NPR and it was perfect! Icing was yummy and I also topped it with blueberries and strawberries
Two questions…at the top of the recipe it says that the cook time is 45 minutes, but in the recipe directions it says 30 minutes with a natural release. Is the 45 minutes including the natural release or is there a typo in one of the two places?
Secondly, I’m using frozen berries. How much extra time should I allow for that? Thanks.
P.S. I may have already asked about the frozen berries, but couldn’t find my question. If so, ignore the message that is previous to this one.
yes you cook at high pressure for 30 minutes. The 45 minutes is the total time it takes to come to pressure and then release the pressure. Frozen berries should be okay for the same time.
Hi – this cake looks so amazing that I have to ask, if this can also be made in the oven? Don’t have an instant pot.
you can! if using this 6-cup bundt pan, they bake for around 25 minutes at 350 F. If using a round pan, around 35-40 minutes maybe?
Thanks a lot! Will bake it and rate it! 🙂
I followed the recipe, and this turned out delicious. I didn’t get the pretty golden brown color from your pictures, but very pretty nonetheless. I weighed the flour (198 g) rather than using 1.5 cup, and I think this made a big difference. I decorated with mint sprigs and halved strawberries, sprinkled with sugar, on top of the cream cheese glaze. It turned out beautifully and tastes kind of like a berry muffin. Thanks!
Hi
I have no cake pan can you please tell me alternative choice
You can try a glass bowl, but then the timing will differ. It will probably need 45-50 minutes.
This was a huge success. After trying a number of cakes in the IP which all came out quite dense and moist, this one hit the spot.
I made a couple of changes, however. Didn’t use vanilla, and I didn’t use baking powder but 2 1/4 tsp baking soda instead. I have learned that under pressure, baked goods need a lot more oomph, and since the cake uses both butter milk and acidic fruit, baking powder isn’t required really, and the baking soda does the job just fine on its own. — This as a comment for those who may not have baking powder on hand! 🙂
I also used a frozen berry mix (not thawed) instead of fresh blueberries and it worked out flawlessly.
Finally, since I didn’t have cream cheese, I made a simple glaze with lemon juice and icing sugar.
The kids and husband loved this cake!
Thanks so much for the first IP cake recipe that came out just right and fluffy!
Thanks for the feedback. I am glad you all enjoyed this cake!
@ Doreen. HA! I have those pans too. I never thought of using them in the IP. Thanks for the great idea.
I’m definitely going to try your delicious looking cheesecake recipe. I love to bake, but it gets pretty hot here in the summer so I’ve been using my good ole 1979 rival crock pot to bake in. I own several
crockpots, but none of them can compete with my old Rival. Plus I happen to own the original Rival Crock Pot Bread and Cake Pan and trivet. The pan has a vented lid so I bet it will work beautifully in the Insta Pot. Thanks so much for your delicious cheesecake recipe.
Made the cake, the first time it was very dense and quite flat so did another one and layered it The whole cake was dry and not moist. Just did another one again, this time I sifted the flour. Was light and moist. A very small cake, probably should have doubled the recipe. Oh, both times I did not add fruit.
Linda, the cake is small. I have used a 6-cup bundt pan here. If I would have doubled the recipe, the batter would overflow from the pan in my opinion. Anyway,glad to know you enjoyed the cake eventually.
I made this according to the recipe but it was still raw after 30 minutes. Any suggestions?
hmm not sure, because I have made this recipe several times and it works well each time. Maybe try adding extra 10 minutes?
Same here. Followed the recipe to a tee. 30 minutes in, 10 minutes natural release and was basically raw batter with a thin cooked edge. Just popped it back in for 12 mins. Will see what happens.
Hmm now I am wondering if it has to do with the shape of the cake pan. I made this recipe several times before sharing but I always made it in my bundt pan and it was done in 30 mins each time. Are you using a round pan? Maybe that takes more time, maybe try 45 minutes? Sorry that it didn’t turn out as expected.
I had the same issue and followed the recipe exactly, including using a Bundt pan. Will see after another 15 minutes of pressure cooking.
hope it worked
my cake was dry, how can I get a moist cake using this recipe. I only wanted a white cake so did not add any fruit
hmm I am not sure what went wrong, it’s a pretty moist cake..
I have a silicone round baking pan with a glass bottom. Will that work?
it might..I am not sure
DO you have to have a trivet in order for this to work?
yes..the trivet that I used comes with the pot so it’s not like you have to buy anything extra.
Use a spring pan as I couldn’t find my bunny
Took 45 minutes instead of 30
Awesome recipe
Thank you
great! 🙂
Hi Manali I like your recipe , do you’ve any Cake and brownies recipe without eggs?
Hi Kalpana, I have lots of eggless recipes on the blog. Just search eggless in the search box. Here you go – https://www.cookwithmanali.com/?s=eggless