Mango Ice Cream (No-Churn & Eggless)
Published Jun 23, 2021, Updated Nov 06, 2024
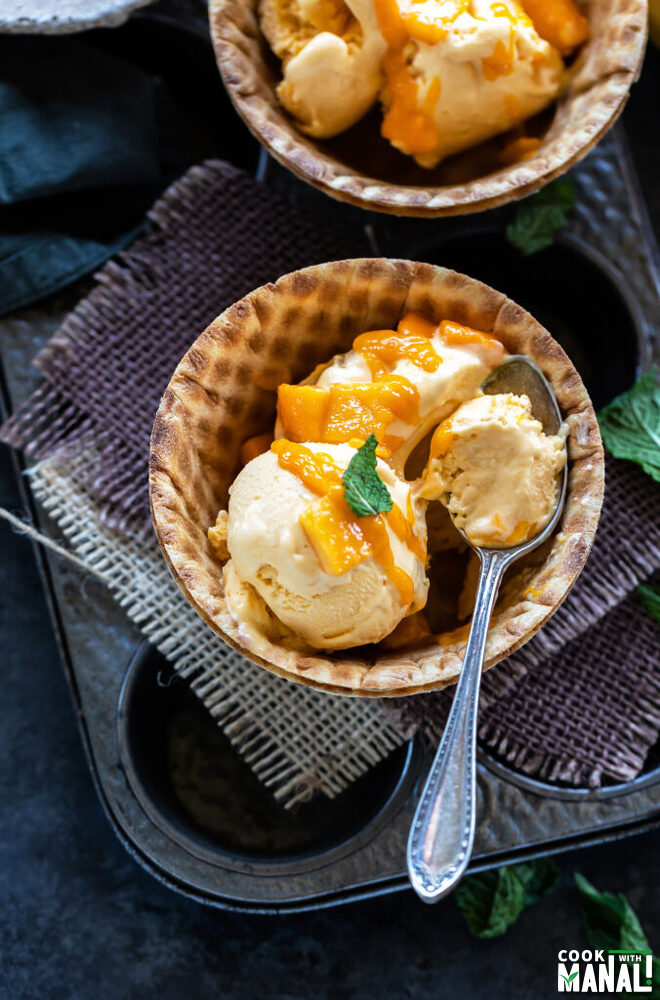
Add CommentEasy, no-churn Mango Ice Cream is the perfect summer treat! Made without an ice cream maker, it's also eggless and takes only 15 minutes of prep time!
This post may contain affiliate links. Please read our disclosure policy.
Use the sweet mangoes in season to make this no-churn Mango Ice Cream. This ice cream is super easy to make with prep time of only 15 minutes! It’s also eggless and you don’t need an ice cream machine to make it!
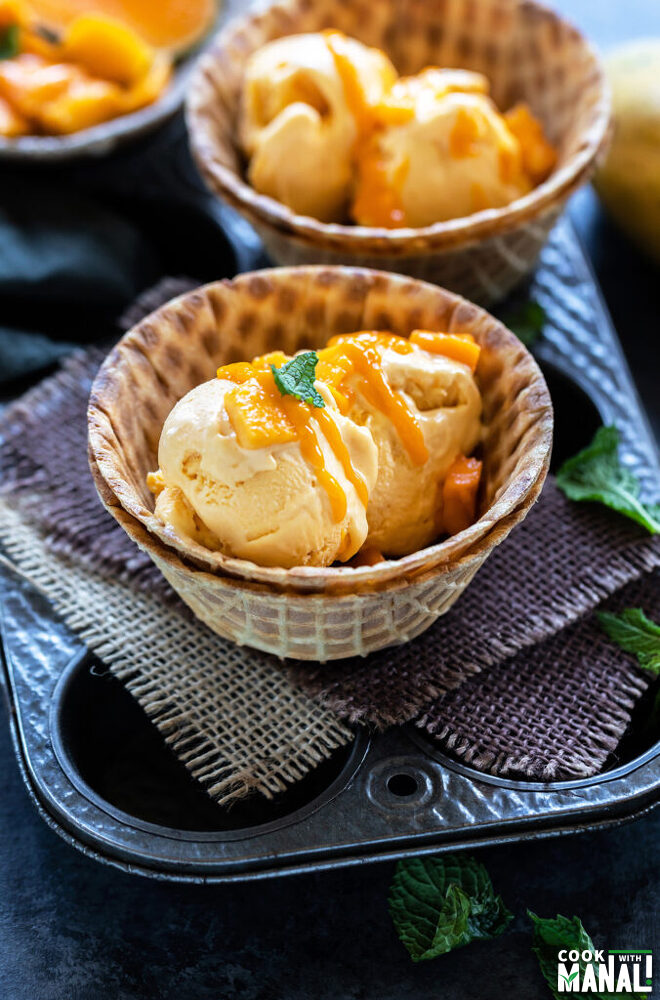
We have been having a bit of mango overdose lately. Our local Indian store is getting regular supply of Pakistani mangoes (which are extremely delicious by the way) and Sarvesh has been buying them like there’s no tomorrow!
Right now, I have 4 boxes of mango and few more from Costco and elsewhere. We are trying to eat them as such and also in form of milkshake, shrikhand etc. I also used some to make this really easy and delicious Mango Ice Cream.
The temperatures are supposed to touch 100 this weekend (which is quite unusual for the Seattle area) so we definitely need something to cool off and this ice cream sounds just about perfect for that.
Why We Love This Recipe
There are several reasons why we love this recipe!
- no churn recipe.
- no ice cream machine needed.
- made with only 3 basic ingredients.
- it’s also eggless.
- the prep time is less than 15 minutes!
I love no churn ice creams, whether it’s my favorite Butterscotch Ice Cream or the Tender Coconut, you can’t beat the ease of no churn ice creams.
Ingredients
As I mentioned above we only have 3 main ingredients here for this mango ice cream recipe.
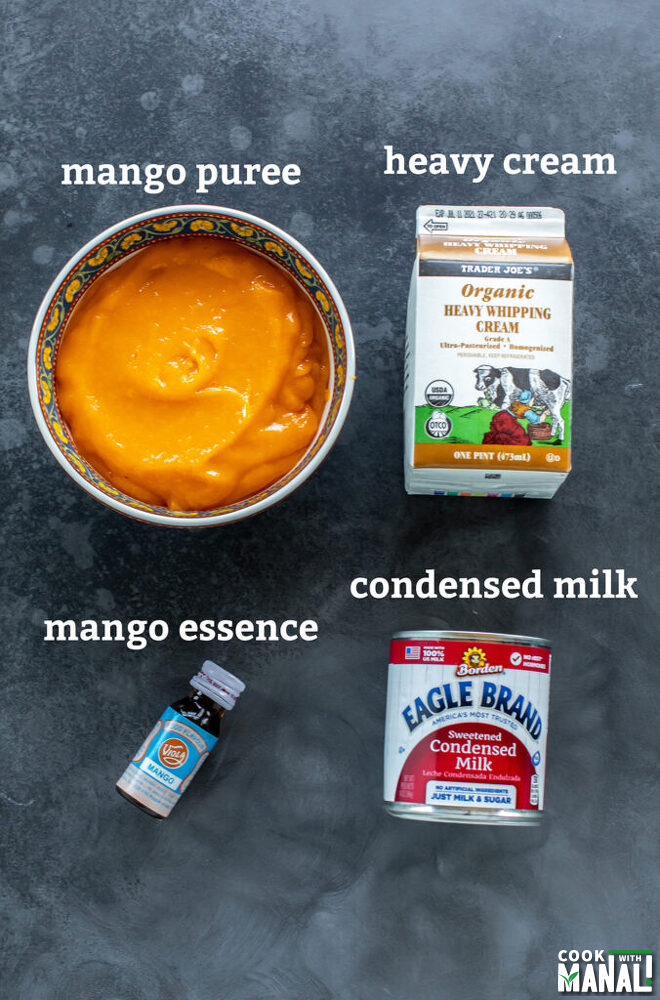
Heavy whipping cream: also known as just heavy cream forms the base of this ice cream. You would need to make sure it’s heavy cream which means it has a fat content of at least 35%.
Condensed milk: to sweeten this ice cream, we use sweetened condensed milk. The condensed milk usually comes in a 14 oz can. You can use the entire can if you like, I usually reserve around 3 tablespoons from the can and use the rest. The mangoes I used were extremely sweet so I didn’t use the entire can. If yours aren’t that sweet, you should use the entire can.
Fresh mango puree: probably the most important ingredient for this mango ice cream recipe. Please use ripe, sweet mangoes which are not stringy and from which you can extract thick mango pulp. We don’t want fibrous mangoes here. I would highly recommend using fresh sweet mangoes for this recipe and if possible not use canned mango puree. However if that’s your only option, make sure to cook it a little before adding to the ice cream base.
Optional: I also added some mango essence just because I had it. Please skip it if you don’t have it. I also like adding little milk powder to my no churn ice creams. Again it is optional but recommended.
Ice crystals in Ice Cream?
Unlike the other no churn ice cream recipes that I have shared on the blog, this one has fresh fruit puree and whenever you have fresh fruits involved, there is going to extra moisture which can lead to ice crystals.
One way to fix this will be to cook the mango puree a little until it thickens. I honestly don’t like doing this because I feel then the mango flavor is reduced further and it doesn’t make much of a difference if you are using the right mangoes to begin with.
The key is to use fresh sweet mangoes, which are not fibrous, don’t have lot of moisture and you can get thick mango puree from them. I have used Pakistani mangoes here (mix of Sindhiri and anwar ratol) vareity and Indian mangoes like alphonso and kesar will be great too.
Using canned mango puree though is a different story. If using canned puree, you should cook it down to decrease the moisture. So, cook for 7 to 8 minutes until it thickens up and then use in the recipe.
Here’s what more you can follow to have no ice crystals in your ice cream-
- Once your ice cream is half set, around 4 hour mark, take it out of the container and using your hand blender or food processor, whip it for 2 to 3 minutes on medium speed until it looks all smooth like a thick smoothie. Then place it back in the container and freeze overnight. My mother-in-law shared this tip with me many years ago, she does this with her kulfi too. I tried a version in which I didn’t whip the ice cream and let it freeze until completely set and one in which I did whip it after 4 hours- the difference was not drastic but yes the one which I whipped was a softer ice cream. The one which I didn’t had some ice crystals (but nothing major that would not let you eat the ice cream).
- When freezing the ice cream, place a plastic wrap above the ice cream so that the plastic wrap touches the surface of the ice cream (there should not be any air between the ice cream and plastic wrap). Then close the container with the lid.
You can honestly do this step of whipping the half set ice cream with every no-churn ice cream and the resulting ice cream will be softer. I am just lazy most times and so skip this step. But when fresh fruits are involved, it is a good idea idea to do the extra step.
Step by Step Instructions
1- Cut 3 medium sweet mangoes and scoop out all the pulp. Transfer the mango pulp to a blender and blend until you have puree. It should be a thick puree. Set this aside.
2- Now, add heavy whipping cream to the steel bowl of your stand mixer (or a large bowl if using a hand blender). Using the wire whisk attachment of your stand mixer or using your hand mixer, whip the cream until it forms soft peaks. We aren’t looking for stiff peaks here. Be careful not to over whip else it might separate. Set this aside.
PS: if you live in a warm place or it’s hot where you are right now, place your steel bowl, wire whisk attachment in the refrigerator for 20-30 minutes before using in the recipe. The cream should of course be totally cold too.
3- Take a large bowl and to that add condensed milk. I used a 14 oz can of condensed milk and reserved around 3 tablespoons of it. The mangoes I used were very sweet so I cut down on the condensed milk a bit. You can use the entire can. To that now add the prepared mango puree, milk powder and mango essence (if using).
4- Using a spatula mix until everything is well combined.
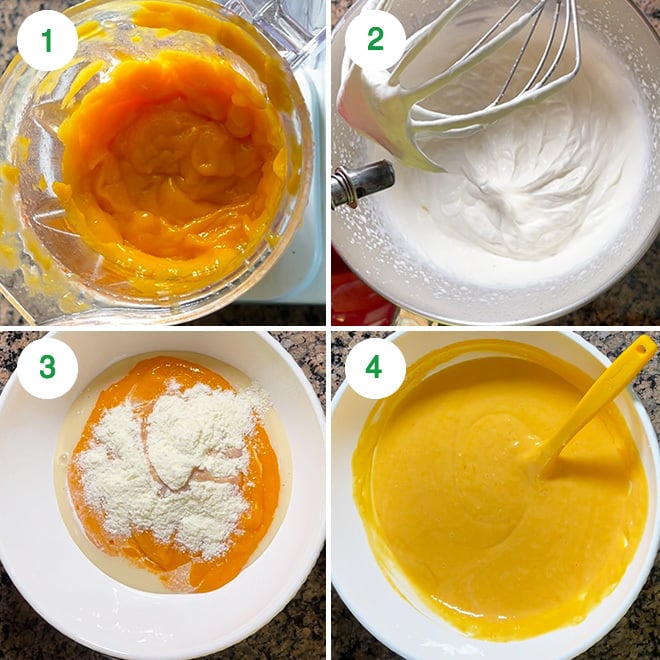
5- Now, start adding the whipped cream into the mixture.
6- Add in parts, folding the cream after each addition until the cream is completely combined. Do this in 3 parts until all the cream is combined.
7- Once all the cream is combined, your ice cream base is ready. You can add yellow food color at this point if you want. I did not add any color.
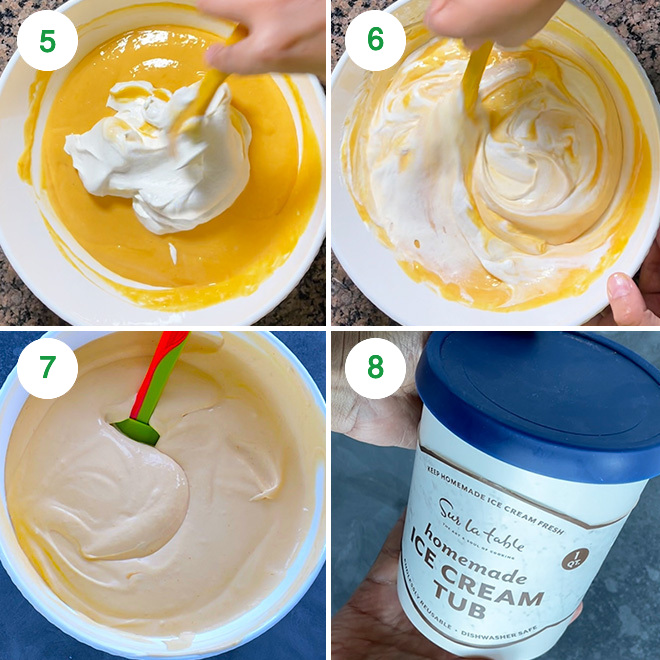
8- Transfer to a ice cream container or any container you want to freeze your ice cream in. Place a plastic wrap on top of the ice cream so that the plastic wrap touches the ice cream surface and there isn’t any space between them. Then close the container and freeze.
If you prefer softer ice cream, take the ice cream out of the freezer after 4 hours when it’s partially set. Transfer to a bowl or food processor and whip for 2-3 minutes until it’s smooth. Then pour back into the ice cream container and freeze overnight (don’t forget the plastic wrap again). Even if you don’t do this step, the ice cream would still be very good. If you whip it, the ice cream will be little softer and less icy.
Once completely set, take the container out of the freezer and let it sit at room temperature for 5 minutes. Then scoop mango ice cream into serving bowls or cones or waffles cones. Top with fresh mango cubes and some fresh mango puree and enjoy!
Can I use Canned Mango Puree?
Yes but since it’s very thin, you should cook it first to make it little thicker and reduce the moisture.
Tips & Notes
- Use heavy cream for this recipe. A lower fat content cream like “Amul” cream that you get in India will not work that well. It should have a fat content of 35% or more.
- If using canned mango puree, cook the puree until it thickens a bit and then use in the recipe. This will help in removing excessive moisture too that the canned puree has.
- Whip the ice cream once it has partially set around 4 hour mark for softer ice cream and no ice crystals.
- If you want you can add some spices like cardamom to this ice cream too. Nuts like pistachios will be nice too.
- Use ripe sweet mangoes which are not stringy for this recipe. You need to use thick mango pulp for this recipe so choose mangoes accordingly.
If you’ve tried this Recipe then don’t forget to rate the recipe! You can also follow me on Facebook, Instagram to see what’s latest in my kitchen and on YouTube to watch my latest videos.
Mango Ice Cream
Ingredients
- 2 cups heavy cream 16 oz
- 14 oz can condensed milk you can use the entire can or reserve around 3 tablespoons of it (I did that since my mangoes were very sweet)
- 2 cups mango puree made from 3 medium mangoes whose pulp was pureed in a blender, mangoes must be ripe and sweet and puree should be thick
- 1/2 teaspoon mango essence skip if you don't have it
- 2 tablespoons milk powder optional but recommended
- fresh cut mangoes and mango puree for serving
Instructions
- Cut 3 medium sweet mangoes and scoop out all the pulp. Transfer the mango pulp to a blender and blend until you have puree. It should be a thick puree. Set this aside.
- Now, add heavy whipping cream to the steel bowl of your stand mixer (or a large bowl if using a hand blender). Using the wire whisk attachment of your stand mixer or using your hand mixer, whip the cream until it forms soft peaks. We aren't looking for stiff peaks here. Be careful not to over whip else it might separate. Set this aside.If you live in a warm place or it's hot where you are right now, place your steel bowl, wire whisk attachment in the refrigerator for 20-30 minutes before using in the recipe. The cream should of course be totally cold too.
- Take a large bowl and to that add condensed milk. I used a 14 oz can of condensed milk and reserved around 3 tablespoons of it. The mangoes I used were very sweet so I cut down on the condensed milk a bit. You can use the entire can. To that now add the prepared mango puree, milk powder and mango essence (if using).Using a spatula mix until everything is well combined.
- Now, start adding the whipped cream into the mixture. Add in parts, folding the cream after each addition until the cream is completely combined. Do this in 3 parts until all the cream is combined.Once all the cream is combined, your ice cream base is ready. You can add yellow food color at this point if you want. I did not add any color.
- Transfer to a ice cream container or any container you want to freeze your ice cream in. Place a plastic wrap on top of the ice cream so that the plastic wrap touches the ice cream surface and there isn't any space between them. Then close the container and freeze. If you prefer softer ice cream, take the ice cream out of the freezer after 4 hours when it's partially set. Transfer to a bowl or food processor and whip for 2-3 minutes until it's smooth. Then pour back into the ice cream container and freeze overnight (don't forget the plastic wrap again). Even if you don't do this step, the ice cream would still be very good. If you whip it, the ice cream will be more soft and less icy.
- Once completely set, take the container out of the freezer and let it sit at room temperature for 5 minutes. Then scoop into serving bowls or cones or waffles cones. Top with fresh mango cubes and some fresh mango puree and enjoy!
Notes
- Use heavy cream for this recipe. A lower fat content cream like “Amul” cream that you get in India will not work that well. It should have a fat content of 35% or more.
- If using canned mango puree, cook the puree until it thickens a bit and then use in the recipe. This will help in removing excessive moisture too that the canned puree has.
- Whip the ice cream once it has partially set around 4 hour mark for softer ice cream and no ice crystals.
- If you want you can add some spices like cardamom to this ice cream too. Nuts like pistachios will be nice too.
- Use ripe sweet mangoes which are not stringy for this recipe. You need to use thick mango pulp for this recipe so choose mangoes accordingly.
Nutrition
Nutrition information is automatically calculated, so should only be used as an approximation.

