Restaurant Style Garlic Naan
Soft and Buttery Homemade Garlic Naan - just like the one from your favorite Indian restaurant! Enjoy it with your favorite curry!
This post may contain affiliate links. Please read our disclosure policy.
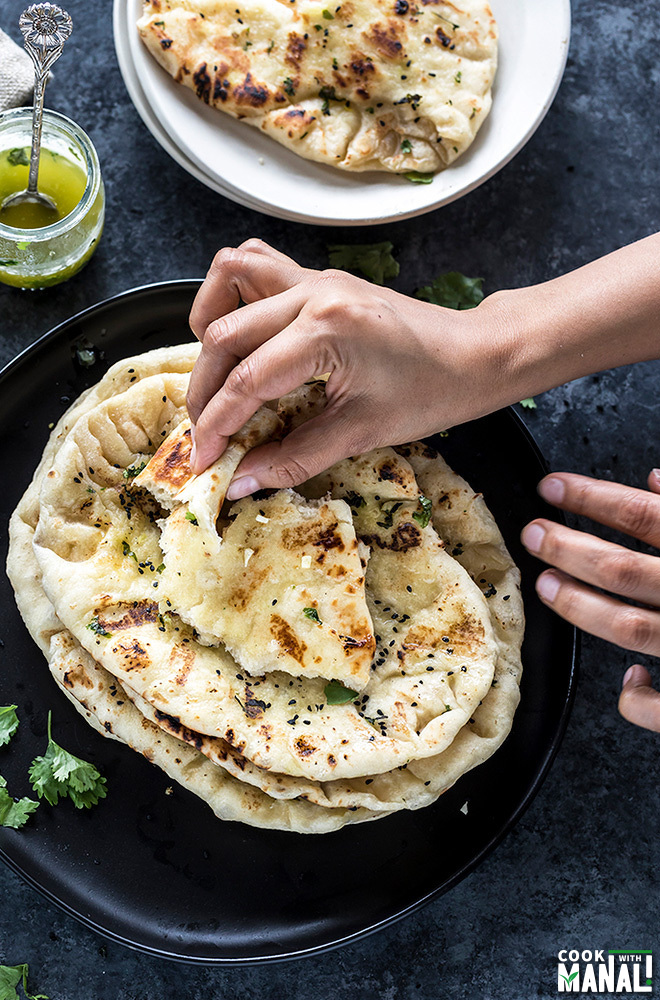
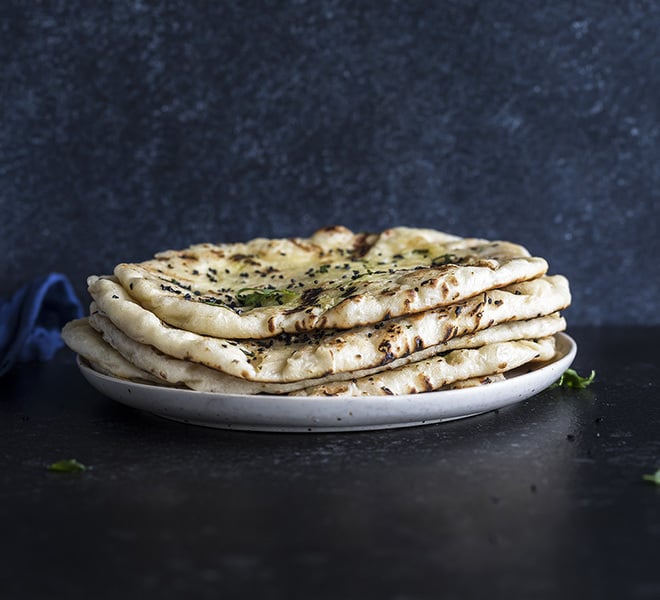
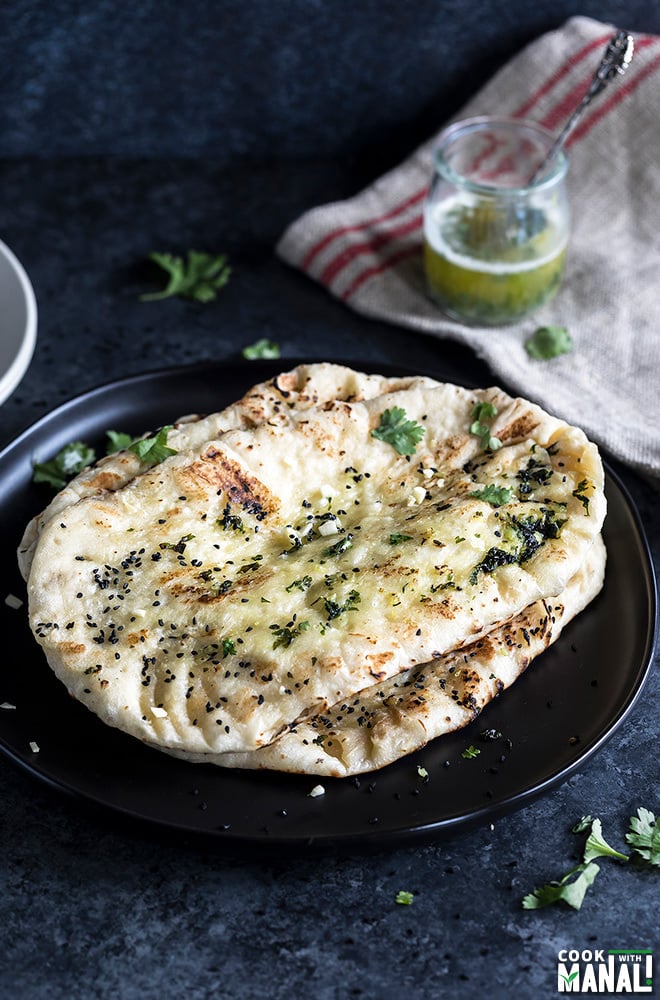
Soft and delicious this is the only Garlic Naan recipe that you will ever need!
Make restaurant style garlic naan at home with this easy step-by-step recipe.
I am so excited to share this restaurant style Garlic Naan recipe with you guys!
Guys, I made this recipe months ago. I remember the day the I made this, I could barely keep up with my excitement. The reason was that these garlic naan turned out so good, like way beyond my expectations and I was so thrilled with the results that I wanted to share it on the blog immediately!
But then few things came up, then we went to Europe, then to India and somehow, I never got around sharing this amazing garlic naan recipe. Well, better late than never! This recipe of Garlic Naan is the only recipe of naan that you will ever need, I promise!
What Do We Need To Make Naan?
Naan is a leavened bread hugely popular in South Asia. In India, it’s one bread that’s always on the menu of every party, wedding, birthday etc. Honestly speaking, naan isn’t something that people in India eat everyday at home.
It’s something that we grew up eating in restaurants too. I don’t remember my mom ever making naan for us at home. What we had at home was roti and paratha. Naan was for restaurants, just like it is today.
Like most breads, naan too is made with basic ingredients like flour, yeast, water/milk, sugar. I add some yogurt to it keep it soft and nice. Since this recipe is for garlic naan, I also add some grated garlic to the dough and then brush the naan with lots of garlic butter.
I made this garlic naan on stove-top. Traditionally naan is made is made in a tandoor (clay oven) but at home, I prefer the stove-top method. You can bake them in oven but I think they are so much softer and better when cooked on stove-top.
Also, I highly recommend cooking these on a cast iron skillet. I have made these on non-stick and other pans, they taste so much better when made on a cast iron.
This Homemade Garlic Naan
✓ is just like the one at your favorite restaurant!
✓ easy to make at home with basic pantry ingredients
✓ tastes great with dal makhani or paneer tikka masala
✓ is packed with all the goodness of garlic
✓ costs way less than buying naan from stores!
I had a blast making this garlic naans at home. The thing with naan is that once you get the hang of it, you would never want to buy one from store. You know those rubbery, stretchy frozen naans that you get at stores? Seriously yuck! Plus, costly too!
On the other hand these homemade garlic naan are soft, packed with fresh garlic flavor and you would have a hard time keeping your hands off them! I won’t tell you guys how many I ate straight out of the pan.
But they were seriously so good that I have no regrets!
One Naan Recipe – Many Possibilities!
This is a great basic naan recipe. You can use the same recipe to make other flavors of naan.
Butter naan: skip the grated garlic in dough. Brush with melted butter only (no garlic).
Mint Naan: skip the garlic in dough. Mix dried mint with melted butter and brush the naan with this butter. Sprinkle fresh chopped mint on top.
Pesto Naan: add little pesto, seal the naan and then roll again. Brush with melted butter.
You get the idea, right? You can add so many seasonings here? Za’atar or chipotle anyone?
Freezing the Naan
Can you make these garlic naan in advance and freeze them? Yes you can!
To freeze make the dough, let it rise. Then divide the dough into equal parts and roll them. Place a piece of parchment paper and then place a rolled naan on top of it. Now place another piece of parchment paper on top of the rolled naan and then place another naan on top.
Basically, you have to stack them one by one, with a layer of parchment paper in between each naan. Once you have stacked them all, place them in a freezer bag, squeeze out as much air as possible and freeze.
Method
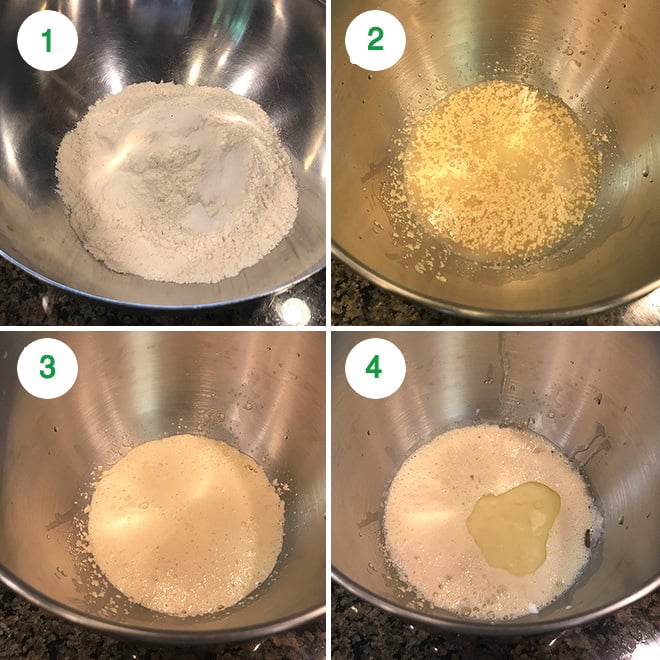
1- In a bowl whisk together 3.25 cups all purpose flour (423 grams) with 1 teaspoon salt. Set it aside.
2- To the steel bowl of your stand mixer, add lukewarm water and then add the sugar and yeast. Let it bloom for 5-10 minutes.
3- You will know the yeast is activated when its all bubbly and frothy on top.
4- Once the yeast in activated, add to it lukewarm milk, yogurt and oil.
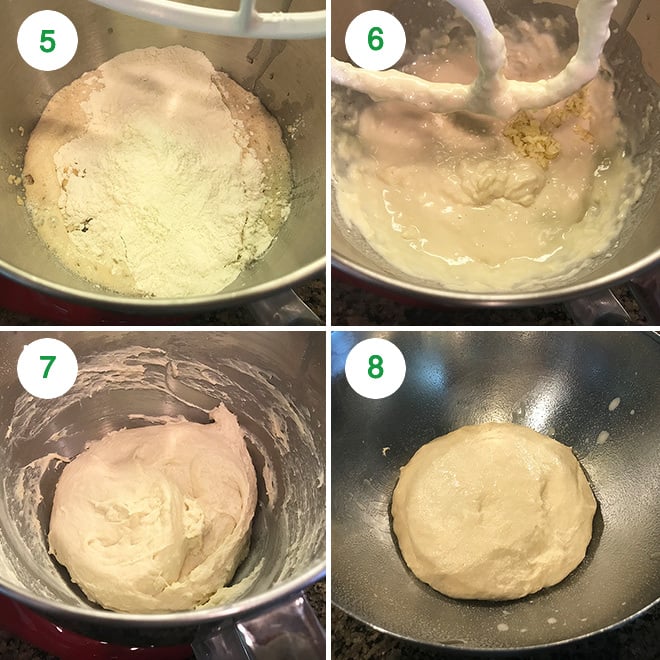
5- Add the flour mixture and mix until combined.
6- Also add the grated garlic. Start adding the remaining 3-4 tablespoons of flour (27-36 grams). Add 1 tablespoon at a time and add more if the flour is too sticky.
7- I added around 3-4 tablespoons flour at this point. The dough will be sticky, so do not add more flour to make it dry. It just shouldn’t be very sticky.
8- Knead with hands or with the dough hook attachment of your stand mixer for 1-2 minutes until the dough is smooth. Transfer the dough to a greased bowl.
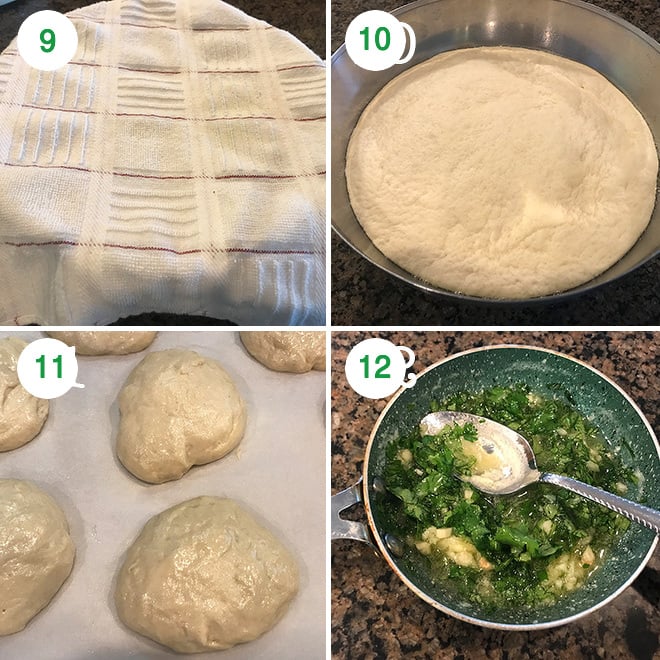
9- Cover the bowl with a kitchen towel and the the dough rise in a warm place for 60-90 minutes. If it cold where you live, pre-heat your oven for few minutes and then turn it off. Then place your dough inside the oven (remember the oven should be off!)
10- After around 90 minutes, the dough will be more than double in size. Punch the dough lightly to release the air.
11- Divide the dough into 8 equal parts (around 100-105 grams each). Dough will be sticky so oil your hands while dividing the dough. Cover the dough balls with a kitchen towel and let them rest for 10-15 minutes.
12- Meanwhile melt 3 tablespoons of butter, add minced garlic and chopped cilantro to it. Keep the garlic butter ready to brush on the naan.
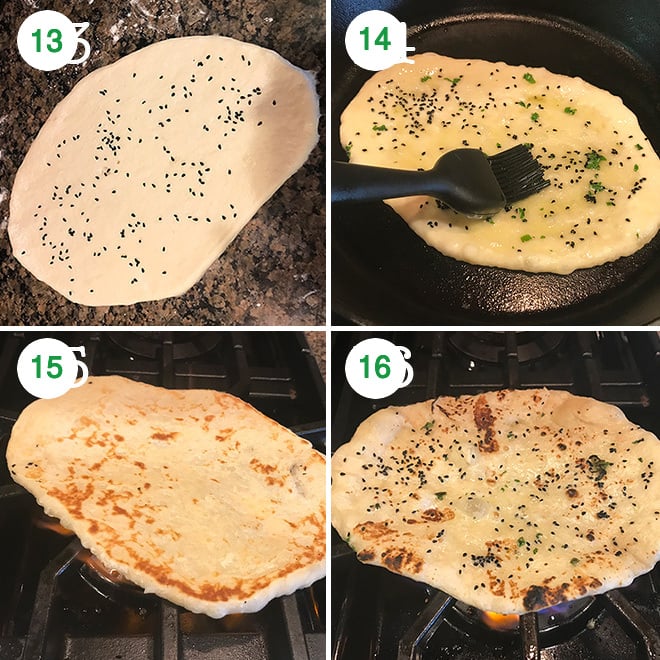
13- Heat up an iron skillet on medium-high heat. I really recommend using an iron skillet to make these naan. Take a dough ball and roll it into an oval shape, around 10 to 11 inches long and 6 inches wide. Apply little oil on top of the dough before you try to roll it. Also oil your roller. Do not try to roll the dough like you would roll a tortilla/roti/paratha. Simply stretch it length wise and then width wise.
Dip your finger in water and then sprinkle some nigella seeds on top. This is optional.
14- Transfer the rolled naan onto the hot skillet. Let it cook for couple of minutes until you see bubbles on top. Brush the naan at this point with the prepared garlic butter.
15- With the help of a tong, remove the naan from skillet, flip and transfer directly to the gas. There will be a little mess as the butter will pour down – don’t worry, it’s okay.
If you want you can cover your burner with aluminium foil before you begin cooking the naan.
You can also skip the step of applying butter at this point and apply it directly once the naan is cooked. I like applying it twice –>more garlic flavor!
16- Cook the garlic naan for 15-20 seconds (directly on gas) until nicely golden brown from both the sides.
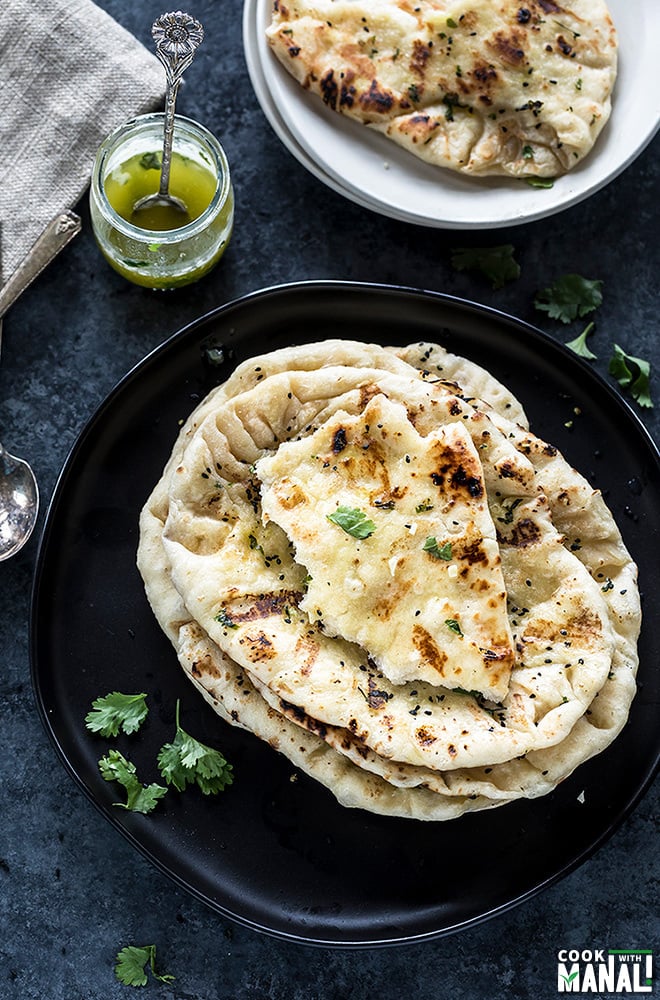
Remove from heat and brush with more garlic butter. Serve these homemade garlic naan with dal makhani or butter paneer!
To cook the garlic naan in oven – pre-heat oven to 500 F degrees. Arrange rolled naan on a baking tray and then bake for 4-5 minutes or until golden brown. Remove naan from oven and apply the garlic butter. If you want, you can place the naan in the oven under broiler to get them charred.
Enjoy!
If you’ve tried this Restaurant Style Garlic Naan Recipe then don’t forget to rate the recipe! You can also follow me on Facebook, Instagram, Pinterest and Twitter to see what’s latest in my kitchen!
Restaurant Style Garlic Naan

Ingredients
- 3.25 cups +3-4 tablepoons all purpose flour 423 grams + 27-36 grams), also known as maida
- 1 teaspoon salt
- 1 cup water lukewarm, 8 oz
- 1 tablespoon sugar
- 2 teaspoons active dry yeast
- 1/3 cup milk lukewarm
- 2 tablespoons plain yogurt
- 3 tablespoons oil I used vegetable
- 2 large garlic cloves grated
- nigella seeds/kalonji
Garlic Butter, to brush on naan
- 3 tablespoons butter I used unsalted
- 3 tablespoons chopped cilantro
- 2 teaspoons minced garlic
Instructions
- In a bowl whisk together 3.25 cups all purpose flour (423 grams) with 1 teaspoon salt. Set it aside.
- To the steel bowl of your stand mixer, add lukewarm water and then add the sugar and yeast. Let it bloom for 5-10 minutes. You will know the yeast is activated when its all bubbly and frothy on top.
- Once the yeast in activated, add to it lukewarm milk, yogurt and oil.
- Add the flour mixture and mix until combined.
- Also add the grated garlic. Start adding the remaining 3-4 tablespoons of flour (27-36 grams). Add 1 tablespoon at a time and add more if the flour is too sticky. I added around 3-4 tablespoons flour at this point. The dough will be sticky, so do not add more flour to make it dry. It just shouldn't be very sticky.
- Knead with hands or with the dough hook attachment of your stand mixer for 1-2 minutes until the dough is smooth. Transfer the dough to a greased bowl.
- Cover the bowl with a kitchen towel and the the dough rise in a warm place for 60-90 minutes. If it cold where you live, pre-heat your oven for few minutes and then turn it off. Then place your dough inside the oven (remember the oven should be off!)
- 10- After around 90 minutes, the dough will be more than double in size. Punch the dough lightly to release the air.
- Divide the dough into 8 equal parts (around 100-105 grams each). Dough will be sticky so oil your hands while dividing the dough. Cover the dough balls with a kitchen towel and let them rest for 10-15 minutes.
- Meanwhile melt 3 tablespoons of butter, add minced garlic and chopped cilantro to it. Keep the garlic butter ready to brush on the naan.
- Heat up an iron skillet on medium-high heat. I really recommend using an iron skillet to make these naan.
- Take a dough ball and roll it into an oval shape, around 10 to 11 inches long and 6 inches wide. Apply little oil on top of the dough before you try to roll it. Also oil your roller. Do not try to roll the dough like you would roll a tortilla/roti/paratha. Simply stretch it length wise and then width wise.
- Dip your finger in water and then sprinkle some nigella seeds on top. This is optional.
- Transfer the rolled naan onto the hot skillet. Let it cook for couple of minutes until you see bubbles on top. Brush the naan at this point with the prepared garlic butter.
- With the help of a tong, remove the naan from skillet, flip and transfer directly to the gas. There will be a little mess as the butter will pour down - don't worry, it's okay. If you want you can cover your burner with aluminium foil before you begin cooking the naan.You can also skip the step of applying butter at this point and apply it directly once the naan is cooked. I like applying it twice -->more garlic flavor!
- Cook the garlic naan for 15-20 seconds (directly on gas) until nicely golden brown from both the sides.
- Remove from heat and brush with more garlic butter. Serve these homemade garlic naan with dal makhani or butter paneer!
To Cook Garlic Naan in Oven
- To cook the garlic naan in oven - pre-heat oven to 500 F degrees. Arrange rolled naan on a baking tray and then bake for 4-5 minutes or until golden brown. Remove naan from oven and apply the garlic butter. If you want, you can then place the naan in the oven under broiler to get them charred.
Notes
Nutrition
Nutrition information is automatically calculated, so should only be used as an approximation.





Adding garlic killed the yeast. The dough didn’t rise. Resulted in dense bread. What a waste of time
Hi Varun, thanks for trying the recipe. I have never had that experience with garlic killing the yeast personally. I would pay more attention to the water temperature and if the yeast was active to begin with. Also, this recipe has been successfully tried by hundreds of people on the blog so I am pretty confident about it.
I LOVED this! What a great recipe! The fluffiest garliciest full of flavor naan i have ever had!!! I paired it with butter chicken, veggies and rice. The naan was gone in seconds having the whole family in awe!
so glad to know! Thanks for trying!
I have made this recipes many times now and it is absolutely delicious. Better than any naan that I have gotten at a restaurant or premade at the grocery store. Thank you so much for this recipe.
Werent fluffy, very sticky dough recipe
Hi Chantelle, I am sorry you had trouble. The dough is sticky, adding more flour makes the naan dense. Grease your hands with oil, let the dough rest after every step and then it does become manageable. I have used this recipe for many years and it has always worked so hope you will try it again. Thanks!
Can I substitute sour cream in place of the yogurt?
Thank you!
I think it should work
Hey I would like to try this as well, did this work for you?
Absolutely delightful. I’ve been using this recipe for about 4 years. Everyone loves it. I like to knead for 5-6 minutes, I use black seeds just like Manali. I also do a second rise for 30 minutes after making the balls — the tops of the dough balls get slightly dry in the air, which actually works in my favor because I can put the side of the ball that was exposed to the air on the counter to form the shape, since the dough is a bit sticky. Then on to the hot pan. Pillowy, soft soft soft. Tasty.
glad you enjoy it Mary!
I made it today. Perfect garlic naan! Love it!
It is fluffy and full of taste!
Thank You For sharing.
Thanks so much for trying! 🙂
Hi!
I tried this recipe and it is absolutely perfect, thank you SO much for sharing.
Special thanks to your instructions on freezing – I have always been reluctant to freeze dough but tried it this time and it worked perfectly.
So, thanks again!
so glad to hear!
hi, hope youre well. i absolutely love this recipe. however i was wondering whether it is possible to make the naan & then freeze it. make as in ‘fry’ it & butter it up & then freezing it? i have seen people do this with rotis.
yes you can, should be okay
Hello Manali, thanks for your recipe, it tastes awesome!
Since I didn’t have a gas burner, I put it on a stainless baking sheet preheated in an oven at 500 °F, and the naans were ready in about 6-7 min keeping the temperature at 500 °F.
However, the dough split to make a pocket. Any tips on how to avoid that? Was my dough too liquid?
Thanks in advance!
you mean there was a pocket like in pita bread? That is okay, I mean I don’t see that as a problem if the naan puffs up in the oven.
AMAZING! My husband and I made these today and it was not only fun, but it came out great! We have an electric stove, so we used an iron skillet and then finished them off on a griddle…these are so good! Thank you so much for sharing this recipe.
welcome Leslee!
Perfect and delicious!
I have tried this recipe and loved it!
Tastes just like the naans you would get at Indian restaurants.
I want to make more and store them for a longer period. Please instruct on how to use the frozen naan bread.
Thanks so much for sharing this delicious recipe. 🙂
Hi Ash! Thanks for trying the recipe, glad you like it. You can either roll the naans, stack them between layers of parchment paper and freeze or you can cook the whole naan (don’t apply the butter) and freeze. Re-heat in a pan and brush generously with the garlic butter.
Have tried making Naan bread twice before from scratch but this hit a home run. It is made for my favorite cast iron. Thanks for the recipe.
glad to know!
Such a superb naan recipe !! Had to make mine in a regular pan I just chose the thickest pan that I had. If you roll it, fold it, roll it again wait for it to rise and then roll it out one last time you will get that nice flaky restaurant style
So good 😊. I won’t buy naan bread at the grocery store anymore…
I tried to do Naan Bread so many times but this is hands down the best recipe I ever tried. My family was fighting over the Naan Breads like wolves, the plate was empty in a second. Thank you so much! I have saved this recipe forever. I made sure to keep the dough sticky (by NOT adding too much flour at the end), and the naan turned out soft and delicious instead of dry or dense. Amazing!
glad to know! 🙂 Thanks for trying